Tutorial: Create a custom subdomain in Amazon Route 53 for a GitLab Pages website
When you create a GitLab Pages website, it has a default domain in the form of *.gitlab.io.
You can register your own custom domain using a suitable domain registration service,
then use that domain with your Pages website instead.
You might want to go a step further. What if you want multiple websites that use the same root domain, such as example.com, but are hosted separately?
For example, you have two websites: a cooking blog and an online store that sells your cookbooks and branded kitchen utensils. Because of the different nature of these sites, you use different website builders for each one. For your blog, you use a website builder that specializes in creating attractive posts. For your store, you use a website builder that has integrated payment options.
You want the same root domain for both sites, so it’s clear to users that they are still on your website.
To do this, you can create a subdomain, which you do by adding a prefix to your root domain.
For example, you can host your shop on example.com and create a subdomain called blog.example.com for your blog.
This tutorial takes you through the steps of creating a custom subdomain (blog.example.com) in Amazon Route 53 to use with your GitLab Pages website on GitLab.com.
Before you begin
You must have:
- A site in a GitLab project that is deployed using GitLab Pages. For an example, see Build, test, and deploy a Hugo website with GitLab in the GitLab documentation.
- An AWS account.
- A registered domain and hosted zone in Amazon Route 53.
Add the custom domain and get the verification code in GitLab
- Sign in to GitLab at https://gitlab.com/users/sign_in.
- On the left sidebar, select Search or go to and find your project.
- Select Deploy > Pages.
- Copy the name of your default Pages domain name. It should look like
*.gitlab.io. You’ll need this information when you set up the subdomain in Amazon Route 53. - Select New domain.
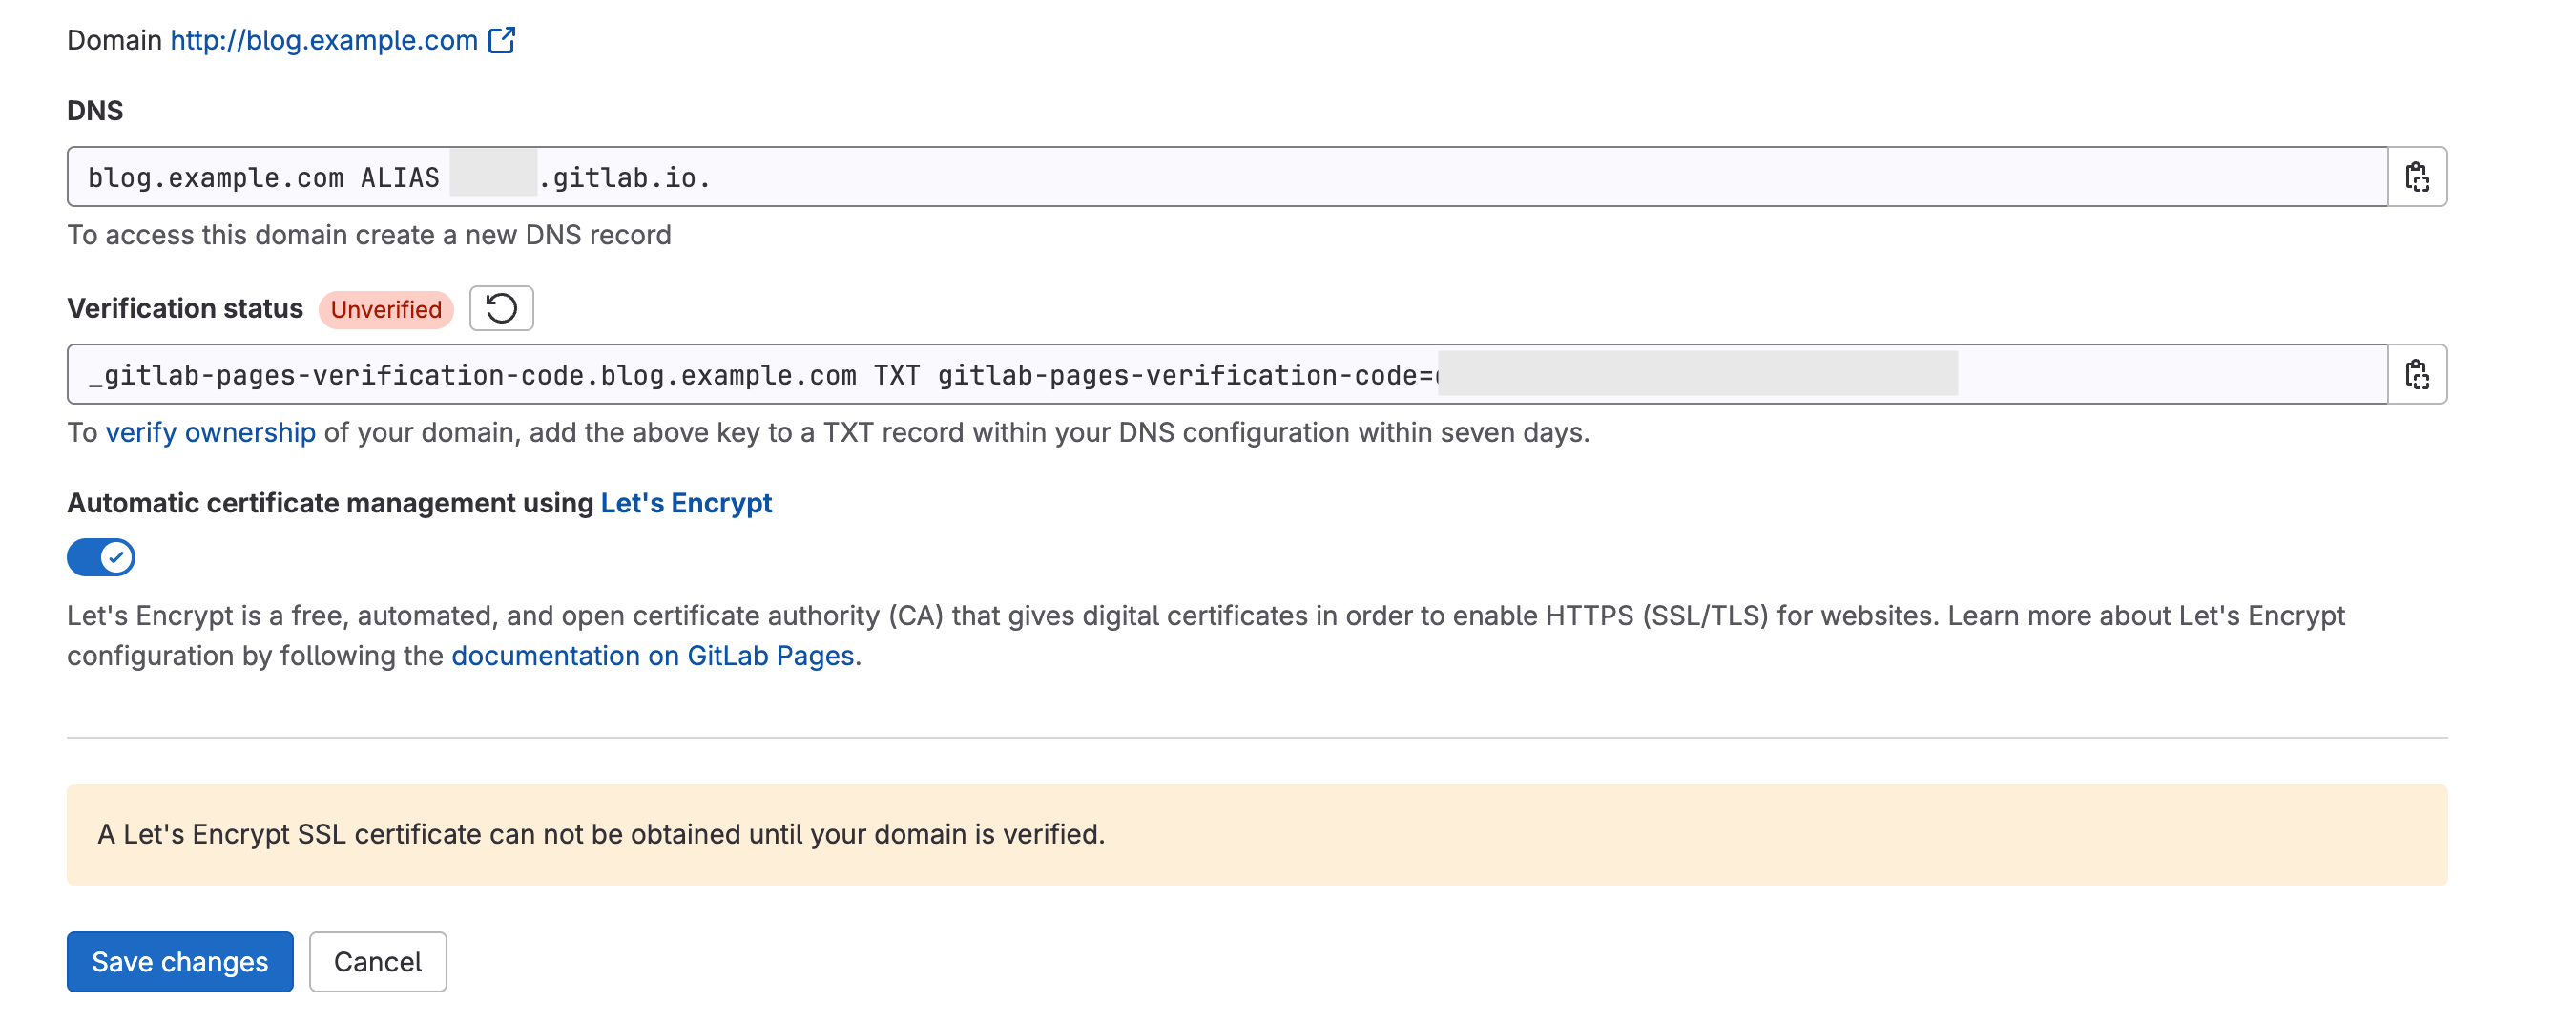
- In Domain, enter the subdomain name. For example,
blog.example.com. - In Certificate, leave the Automatic certificate management using Let’s Encrypt toggle on.
- Select Create new domain.
- In Verification status, copy the verification information. You’ll need this information when you set up the subdomain in Amazon Route 53.
- Select Save changes.
Register a subdomain in Amazon Route 53
In this example, you have already registered a custom domain, www.example.com, in Amazon Route 53.
Now, you’ll create a subdomain for your blog called blog.example.com.
To do this, create a CNAME and a TXT record in the hosted zone for the domain.
- Sign in to the AWS Management Console and open the Route 53 console at https://console.aws.amazon.com/route53/.
- In the navigation pane, select Hosted zones and select your custom domain.
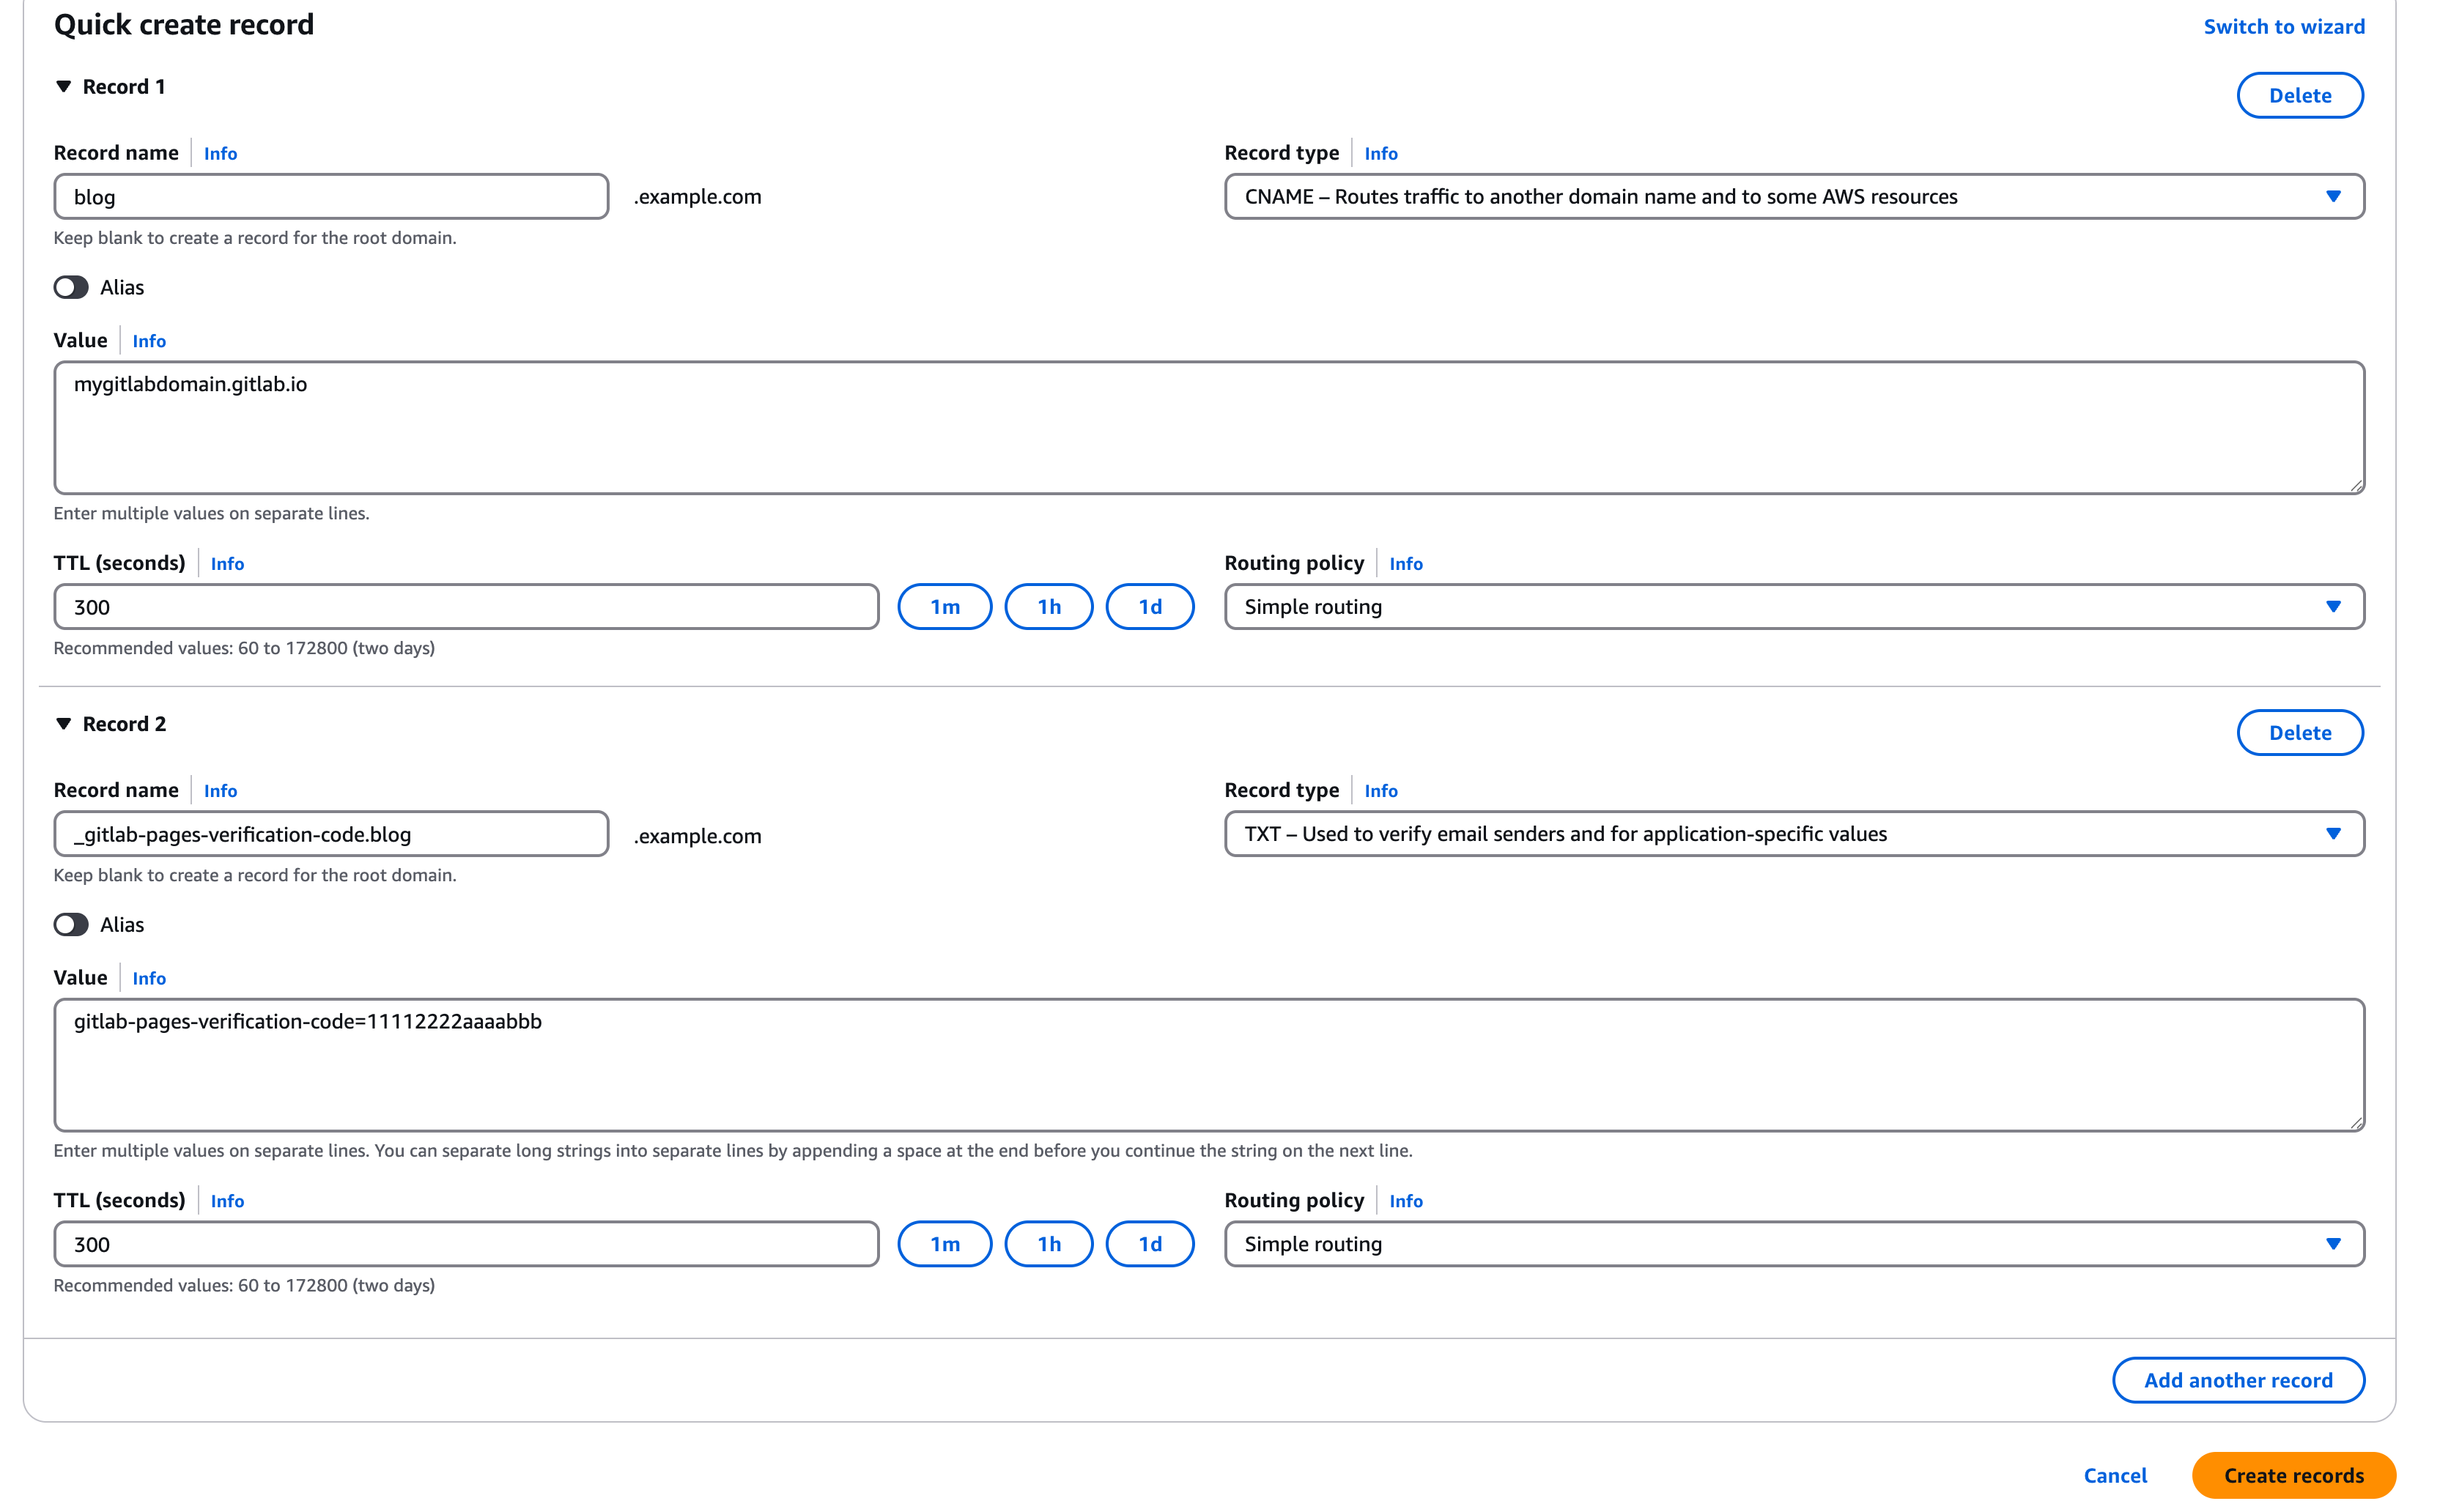
- Select Create record.
- In Record name, enter the prefix for your subdomain. For example,
blog. - From the Record type dropdown list, select CNAME.
- In Value, enter the name of your default Pages domain name. It should have the format
*.gitlab.io. - Select Add another record.
- In Record name, enter the first part of the verification information that you copied earlier. It starts with
_gitlab-pages-verification-codeand ends with your custom subdomain. Enter everything up until the prefix only, for example,_gitlab-pages-verification-code.blog. - From the Record type dropdown list, select TXT.
- For Value, enter the last part of the verification information that you copied earlier.
It is found after
TXT, starts withgitlab-pages-verification-code, and includes an alphanumeric code. Do not include theTXT. - Select Create records.
Verify domain ownership in GitLab
- Return to GitLab.com.
- On the left sidebar, select Search or go to and find your project.
- Select Deploy > Pages.
- Next to the subdomain name, select Edit (a pencil icon).
- In Verification status, select Retry verification (a refresh icon).
- If the status is Verified, test your subdomain by selecting the Domain link.
You’re now using a subdomain for your GitLab Pages website!
It can take half an hour or longer for GitLab to get the Let’s Encrypt SSL certificate for your site. Until then, your website might display a Not Secure or Your connection is not private message. This is resolved when the certification process is complete.
Related topics
- For more information about setting up custom domains in GitLab, including on a self-managed GitLab server, see GitLab Pages custom domains.
- Amazon Route 53 developer guide.